Remote Desktop Connection Not Working? Try This

 Interfacing with a PC distantly is advantageous when it works, and irritating when it doesn't. In the event that your distant work area association is coming up short, you'd need to realize what to attempt to fix it.

In this article, we'll show you that it is so clear to investigate and fix bombed distant work area associations, in view of the most widely recognized foundations for an assortment of Windows working frameworks.

How to Fix Remote Desktop Connection Not Working?

There are plenty of reasons for failing to connect to a remote desktop –  expired certificates, blocked firewalls, issues on the client –  the list goes on. Here we’ll look at how to fix one common cause of insufficient permissions. Please refer to other sections in this article for more fixes.

To assign permissions to users to access the remote desktop from the remote server, do the following:

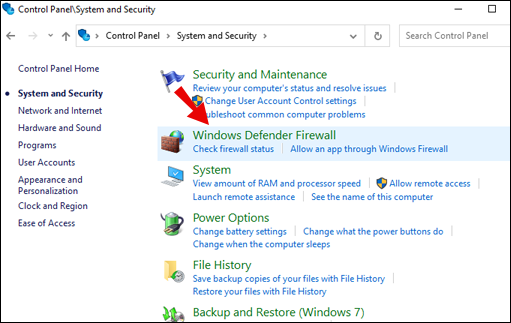
1. Enter GPEdit.msc command in the Windows run prompt.

2. Open Group Policy Object Editor.
3. Through the console tree go to: “Computer Configuration” > “Windows Settings” > “Security Settings” > “Local Policies” > “User Rights Assignment”.

4. Double-click “Allow log on through Remote Desktop Services”.
5. Add the group then click “OK”.
How to Fix Remote Desktop Connection Not Working on Windows 10?
Check that the Windows Defender Firewall service allows remote desktop traffic:
1. Access the “Start” menu and click on “Control Panel.”
2. Select “System and Security.”
3. Select “Windows Defender Firewall.”'
4. Select “Allow an App or Feature Through Windows Defender Firewall.”
5. Then select “Remote Desktop” > “OK.”
How to Fix Remote Desktop Connection Not Working on Windows 8?
Check that the firewall service on Windows Server 2016 allows remote traffic:
  1. Access the Server Manager.
  2. From the left-hand side, select “Local Server.”
  3. The current state of your system will be detected.
  4. If the Remote Desktop is “Disabled” click on “Disabled” to open the “System Properties” window.
  5. Select “Allow remote connections to this Computer” from “System Properties.”
  6. You’ll receive a warning message, click “OK” to proceed.
  7. Click on “Select Users.” to give users or groups permission to connect via remote desktop.
  8. Select “OK”.
  9. From Server Manager, the remote desktop status may still show as “Disabled”, click the refresh button to update to “Enabled.”
How to Fix Remote Desktop Connection Not Working on Wi-Fi?
For a successful remote desktop connection through Wi-Fi, try the following:

  • Ensure your wireless connection is available by checking the status.
  • From your wireless router settings, disable the firewall and turn it off for the client and remote computers. Then from Windows server:
1. Click on “Start” and type “firewall.”
2. Select “Windows Defender Firewall.”
3. On the left pane select “Allow an app or feature through Windows Defender Firewall.”
Allow the following services through the firewall for private and public networks by checking both boxes:
  • “Network discovery”
  • “Remote desktop”
  • ‘Remote service management”
  • “Routing and remote access”
  • “Windows remote management.”
How to Fix Remote Desktop Connection Not Working After Windows 10 Update?
If you’re unable to connect to a remote desktop connection following the windows 10 20H2 update, try the following:
  • If you receive “The remote PC can’t be found” error message then ensure you have entered the correct PC name for the remote PC, or you try entering its IP address.
  • If you receive “There’s a problem with the network” error message, make sure your network adapter is working and try:
  • For home networks: ensure your router is switched on.
  • For wired networks: ensure the ethernet cable is plugged into your network adapter properly.
  • For devices on wireless networks: ensure your PC’s wireless connection is switched on.
To check a computer is accepting remote desktop requests from other network computers, do the following:

1. Right-click “This PC” > “Properties.”
2. Select “Remote Settings” from the System window.
3. Go to the “Remote” tab in “System Properties,” select “Allow remote connections to this computer.”
4. Uncheck “Allow connections only from computers running Remote Desktop with Network Level  Authentication (recommended)”.
5. Select “Apply” and “OK.”
6. Navigate to “Control Panel” > “Network & Internet” > “Network and Sharing Center.”
7. Under the network name, ensure it reads “Private Network.”

How to Fix Remote Desktop Connection Not Working Through VPN?
If you’re not able to connect to a remote desktop via VPN, try the following:

1. Press Windows + R to access the Run command.
2. Type command “devmgmt.msc” > “Ok.”
3. In “Device Manager” expand “Network adapters.”
4. Uninstall the following by right-clicking it >” Uninstall Device” > “Uninstall:”
  • “WAN Miniport (SSTP)”
  • “WAN Miniport (PPTP)”
  • “WAN Miniport (PPPOE)”
  • “WAN Miniport (L2TP)”
  • “WAN Miniport (IKEv2)”
  • “WAN Miniport (IP)”
  • “WAN Miniport (Network Monitor)”
  • “WAN Miniport (IPv6)”.
5. Select “Action” > “Scan for hardware changes” to update the changes.
How to Fix Remote Desktop Connection Not Working From Outside Network?
For a successful remote desktop connection from outside the network, ensure the port is mapped.

Note: This is an outline; steps will differ slightly from router to router. The specific steps for your router should be available online.

Ensure you have the following before mapping the port:

The PC’s internal IP address: “Settings” > “Network & Internet” > “Status” > “View your network properties”. Get the IPv4 address of the network configuration with an “Operational” status.
The router’s IP (your public IP address). Can be found by searching “my IP” via Bing or Google. Or from Windows 10 in “Wi-Fi network properties.”
The port number, which in most cases is the default port used by remote desktop connections (3389).
Admin access to your router.
Once the port is mapped, you’ll be able to connect to the host PC from outside your local network by connecting to the public IP address of your router.

At any time, your Internet Service Provider can assign you a new IP address, causing problems with remote connections. As a workaround, consider using Dynamic DNS, which allows for connections using a domain name as opposed to an IP address.

How to Fix Remote Desktop Connection Not Working With No Error Message?
To troubleshoot a failed remote desktop connection when no error message is present, try the following:

Check whether the remote desktop connection on a local computer is being blocked by a Group Policy Object:
  1. Open a command prompt.
  2. Enter gpresult /H c:\gpresult.html.
  3. Once the command is complete, open gpresult.html. from “Computer Configuration” > “Administrative Templates” > “Windows Components” > “Remote Desktop Services” > “Remote Desktop Session Host” > “Connections,” find the “Allow users to connect remotely by using Remote Desktop Services policy”. If the setting is:
  • “Enabled” – the remote desktop connection is not being blocked by a Group Policy.
  • “Disabled” – check “Winning GPO” to see the Group Policy Object that is blocking remote desktop connections.
To check whether a GPO is blocking remote desktop connections on a remote computer, do the following:
  1. Open a command prompt.
  2. Enter gpresult /S <computer name> /H c:\gpresult-<computer name>.html
  • The file produced will use the same information format as the local computer version.
To modify a blocking Group Policy Object, use one of the following methods:
  1. From search enter Group policy editor and open.
  2. Select the applicable level of GPO e.g., “local” or “domain.”
  3. Navigate to “Computer Configuration” > “Administrative Templates” > “Windows Components” > “Remote Desktop Services” > “Remote Desktop Session Host” > “Connections” > “Allow users to connect remotely by using Remote Desktop Services.”
Then set the policy to “Enabled” or “Not configured.”
On the affected PC’s run gpupdate /force command.
In Group Policy Management, navigate to the organizational unit where the blocking policy is applied to the affected PC’s then delete the policy from the organizational unit.

Additional FAQs
How Do I Reinstall RDP?
To reinstall remote desktop Windows 10, do the following:

1. Select “Start” then right-click “Computer” > “Properties.”
2. Select the “Remote Desktop” tab > “Advanced” > “Allow.”
3. Select “OK,” close the windows, and restart your computer.

RDP will reinstall itself.

How Do I Enable a Remote Desktop Connection?
To grant permission to the accounts that need to connect remotely, do the following:

1. Select “Start” > “Control Panel.”
2. Select “System and Security.”
3. Under the “Systems” tab, select “Allow remote access.”
4. From the “Remote” tab in the “Remote Desktop” section, click on “Select Users.”
5. From the “System Properties” box, select “Add.”
6. Enter the information for an account[s] you need to add, click “OK” when complete.
How Do I Reset Remote Desktop Connection?
To initiate a remote desktop restart, do the following:

1. Open a command prompt.
2. Type: shutdown /r /t 0.
3. Hit enter.

How Do I Fix a Remote Desktop Connection Error?
Below outline two common route causes for RDP connection errors. The steps in solving them may vary slightly depending on your operating system.

Problem 1: Incorrect Authentication and Encryption Settings.

You will receive either of the following error messages:
· “Because of a security error, the client could not connect to the Terminal Server. After making sure that you are logged on to the network, try connecting to the server again.”

· “Remote desktop disconnected. Because of a security error, the client could not connect to the remote computer. Verify that you are logged onto the network and then try connecting again.”

To resolve the problem, configure authentication and encryption by following these steps:

1. Click on “Start”, point to “Administrative Tools” then “Remote Desktop Services” > “Remote Desktop Session Host Configuration.”
2. From “Connections”, right-click the connection name > “Properties.”
3. From the “Properties” dialog box on the “General” tab in “Security layer,” select the security method.
4. Via “Encryption level” select the level you want.

Problem 2: Limited Remote Desktop Service Session Connections or Remote Desktop Sessions.

When trying to make a remote desktop connection to a remote desktop server running Windows Server 2008 R2, you may see the following error messages:

· “Try connecting again. If the problem continues, contact the owner of the remote computer or your network administrator.”
· “This computer can’t connect to the remote computer.”
· “Remote Desktop Disconnected.”

To resolve the problem, try the following methods:

Check the Remote Desktop is enabled:

1. To start the System tool, click on “Start” > “Control Panel” > “System” > “OK.”
2. Under “Control Panel Home”, select “Remote settings.”
3. Select the “Remote” tab.
4. Depending on your security requirements, select one of the options under

“Remote Desktop”:

· “Allow connections from computers running any version of Remote Desktop (less secure).”
· “Allow connections from computers only from computers running Remote Desktop with Network Level Authentication (more secure).”

Check the remote desktop services limit. Verify the limit number of connections policy for remote desktop services:

1. Start the Group Policy snap-in.
2. Open the “Local Security Policy” or applicable Group Policy.
3. Navigate to “Local Computer Policy” > “Computer. Configuration” > “Administrative Templates” > “Windows Components” > “Remote Desktop Services” > “Remote Desktop Session Host” > “Connections Limit number of connections.”
4. Select “Enabled.”
5. Type the maximum number of connections to allow in the “RD Maximum Connections allowed” then “OK.”

Check RDP-TCP properties. To configure the number of simultaneous remote connections allowed per connection, do the following:

1. From the remote desktop session host, click on “Start”, point to “Administrative Tools”, then “Remote Desktop Services.”
2. Under “Connections”, right-click the connection name > “Properties.”
3. From the “Network Adapter” tab select “Maximum connections.”
4. Enter the number of simultaneous connections allowed for a connection, then “OK.”

To add users and groups to the remote desktop users group, using Local Users and Groups snap-in, do the following:

1. Click “Start”, > “Administrative Tools” > “Computer Management.”
2. From the console tree, select “Local Users and Groups.”
3. Double-click the Groups folder.
4. Double-click “Remote Desktop Users” > Add.”
5. To specify search location, click “Locations” in the Search Users dialog box.
6. To specify objects to be searched, select “Object Types.”
7. Type the name you wish to add in the “Enter the object names to select (examples)” box.
8. To locate the name, select “Check Names” > Ok.”

Why Is Remote Desktop Connection Not Working?
There could be several different reasons why a remote desktop connection doesn’t work. When error messages aren’t provided, it’s a matter of troubleshooting to find the cause. To help you figure out what the problem could be, here are two of the most common types:

Network Failure

A remote desktop connection can be unsuccessful when there are no communication paths. You can try to connect from a client that’s been successful in the past to figure out whether the cause is the network, Windows server, or an individual client.

DNS Issues

If a change was made to a host’s IP address, a client will have problems connecting until the DNS resolver cache expires. Follow the steps below to clear the cache:

1. Open a command prompt window.
2. Enter the command: IPConfig /FlushDNS.
3. Now check with the Preferred network adapter that the correct DNS server is being used. If the server details listed are incorrect, you can specify by entering the properties of the computer’s IP address or by configuring it to use a DHCP server.

How Do I Change a Remote Desktop Connection?
To change a remote desktop connection from Windows 10, do the following:

1. From the Start menu > “All Programs” > “Accessories.”
2. Select “Remote Desktop Connection.”
3. As required, change the computer name, IP address, or port number.
4. Select “Connect.”

·In a menu window on your computer, you’ll now see the remote computer’s desktop.
Successful Remote Connections
Being able to connect to another computer remotely has become an essential tool for working remotely.
Now that we’ve provided some of the possible causes for a failed remote desktop connection, we’d like to know what you tried to solve it. Were you able to connect successfully? Let us know in the comment section below.
#viastudy

Post a Comment

0 Comments